THIS TUTORIAL HAS BEEN UPDATED TO TAKE INTO ACCOUNT THE CHANGES THAT AMAZON HAS MADE TO THE LOW-CONTENT UPLOAD PROCESS.
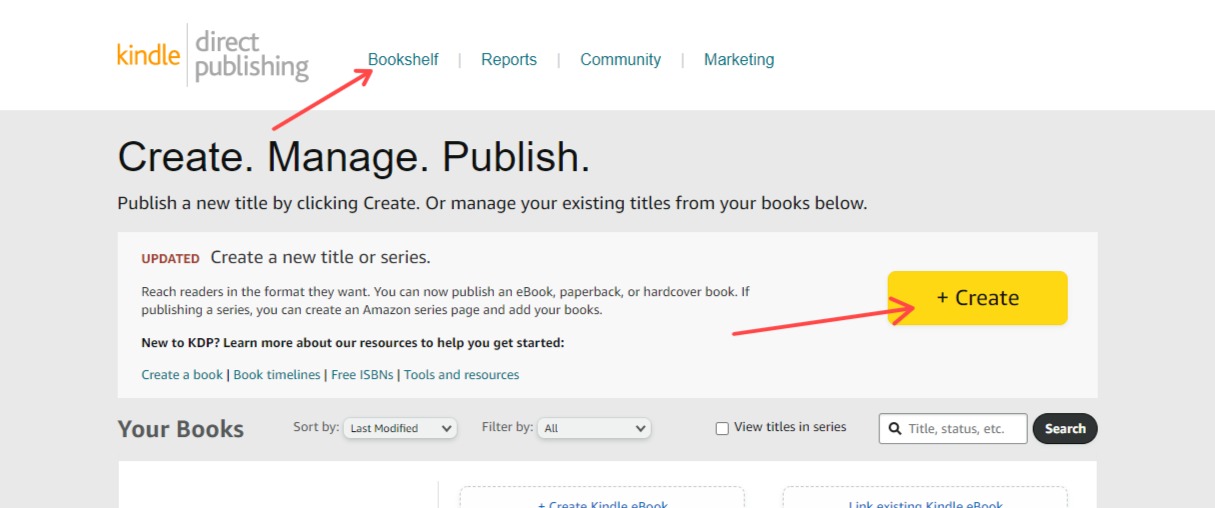
As shown in a previous tutorial, you need to be logged into your KDP account and in your ‘Bookshelf’. Click to upload a paperback book:
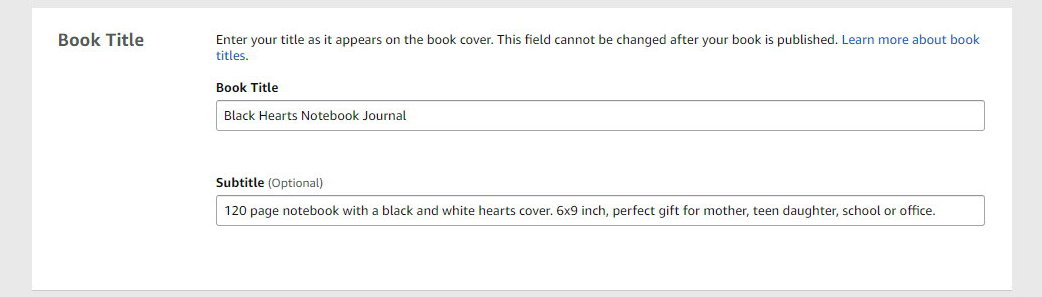
I’ve taken a bit of a chance with my title and subtitle, but I’m hoping it will be approved! I’ve put in a few keywords that may help if people are looking to buy a notebook for a gift, or for school or office purposes. Your title and subtitle are extremely important for getting your notebook ranked, so do think it through. There will be more on this later:
You can’t add your low-content books as a ‘Series’, that’s only for novels and such. It’s also pointless adding version numbers for simple notebooks, so we’ll leave those blank and go to the author. You can use your own name or a pen name:
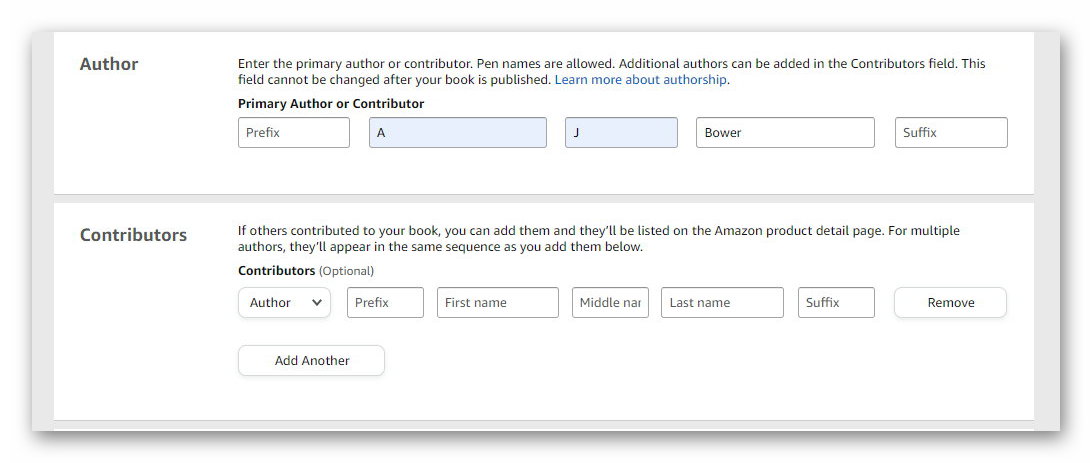
You may want to put some thought into your pen name as it’s possible that others may have the same one, and any social media accounts with the name may not be available. You should probably Google your preferred name(s) to make sure.
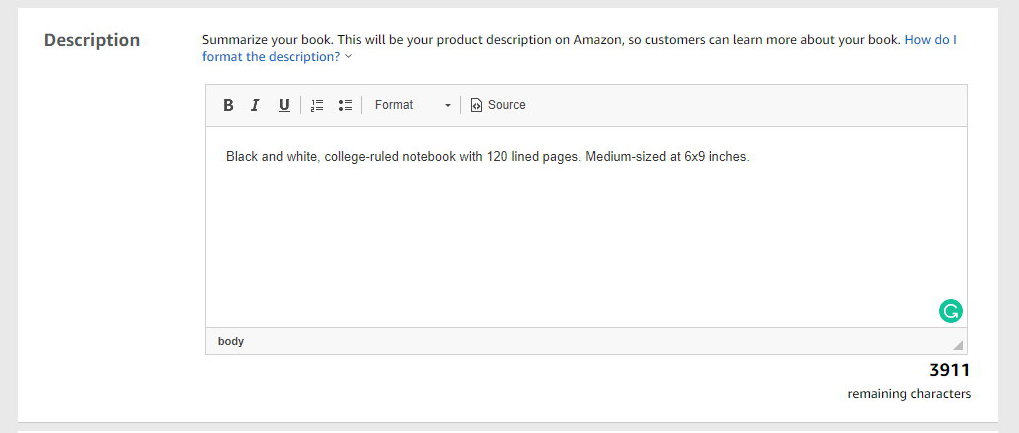
Your book description can be important, so make it as thorough as possible. The description I’ve added isn’t fancy, but it gives all the necessary details:
Click to agree that you own the publishing rights, and then we are on to the all-important keywords! I use a Chrome extension called: AMZ Suggestion Expander.
With that extension enabled, when you type something into the Amazon search bar, it shows other keywords you could use:

You then get an idea of what people are searching for. The free version of the extension has fewer features than the pro, but it may help a little.
Another good Chrome extension is KDP / Amazon BSR & Keyword Research SEO Tool
However, for the purpose of this tutorial, I’m just going to add some basic keywords based on the Amazon search results. It won’t get my notebook ranked very high, as these keywords will probably be used by thousands more books, but we can go into keywords later. Just remember, there is no need to add keywords that are already in your title and subtitle, try to go for something different, but relevant. You can enter phrases or single words, up to 50 characters:

These are very basic, very common keywords, so there will be thousands competing for listing on the first page. Later, we will look at niches and how important they are for ranking purposes.
We will also look at researching your competition and keywords for free and by using a paid software called KDP Rocket (affiliate link).
Next, you need to select up to 2 categories for your book. Later I will show you how to add lots of extra categories, but for now, just select the ones you think are the best fit. You also now need to check if your book will be low-content:
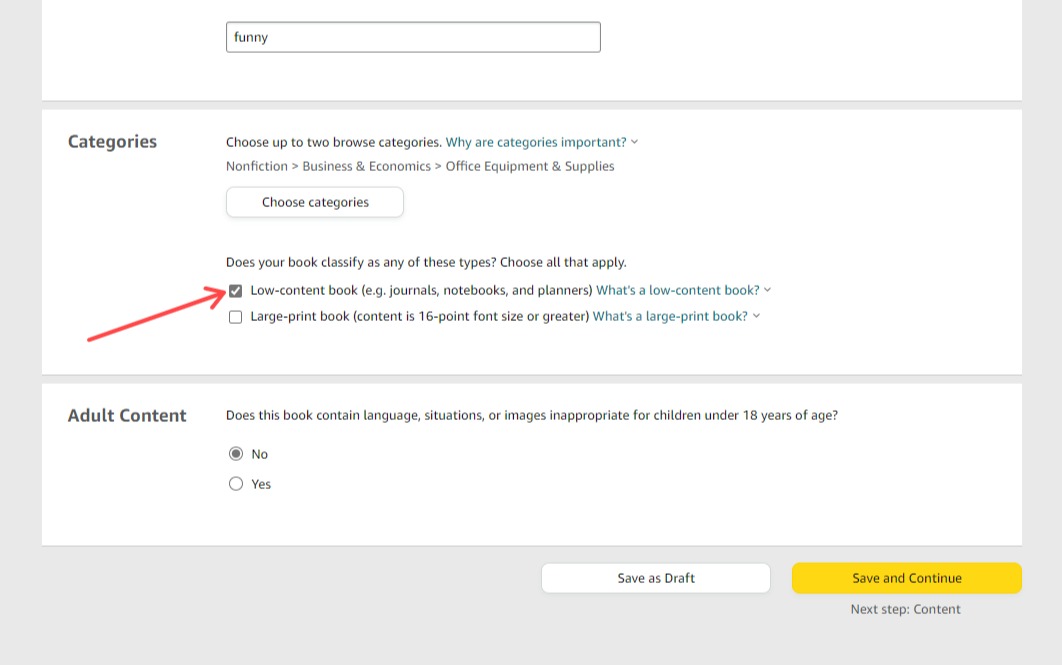
Select whether or not your book contains adult content, then click ‘Save and Continue.
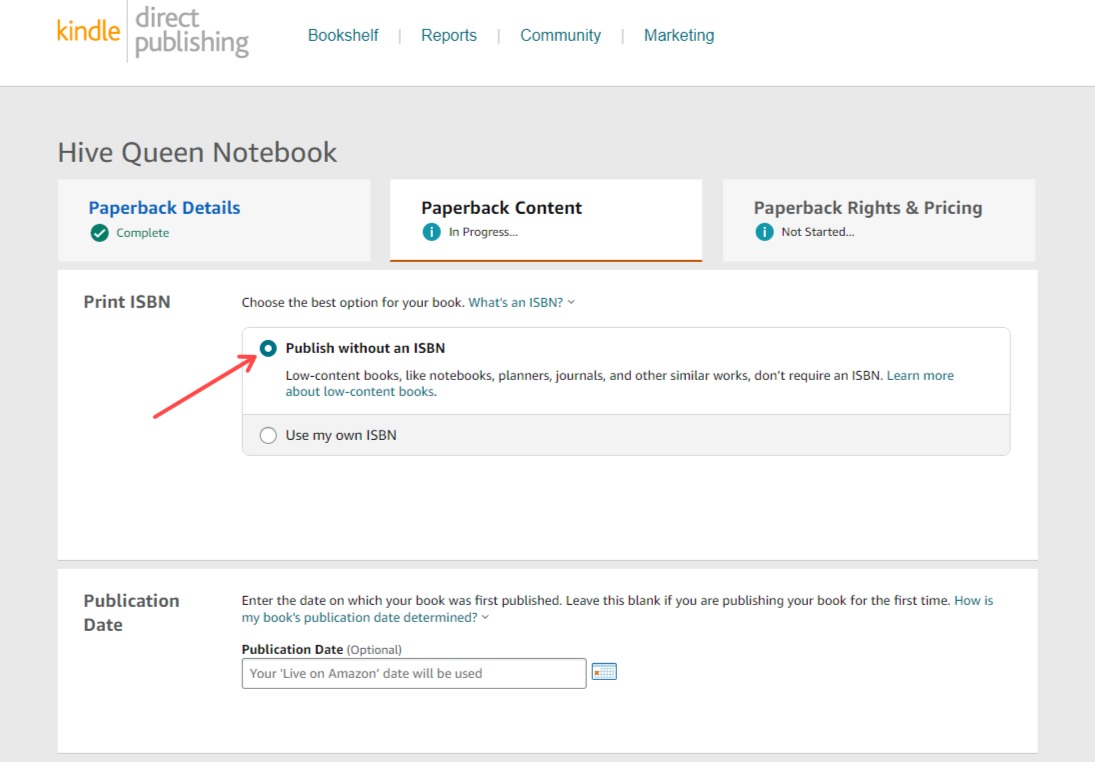
You can’t use one of Amazon’s free ISBNs anymore for low-content uploads, so unless you have your own, click ‘Publish without an ASBN’:
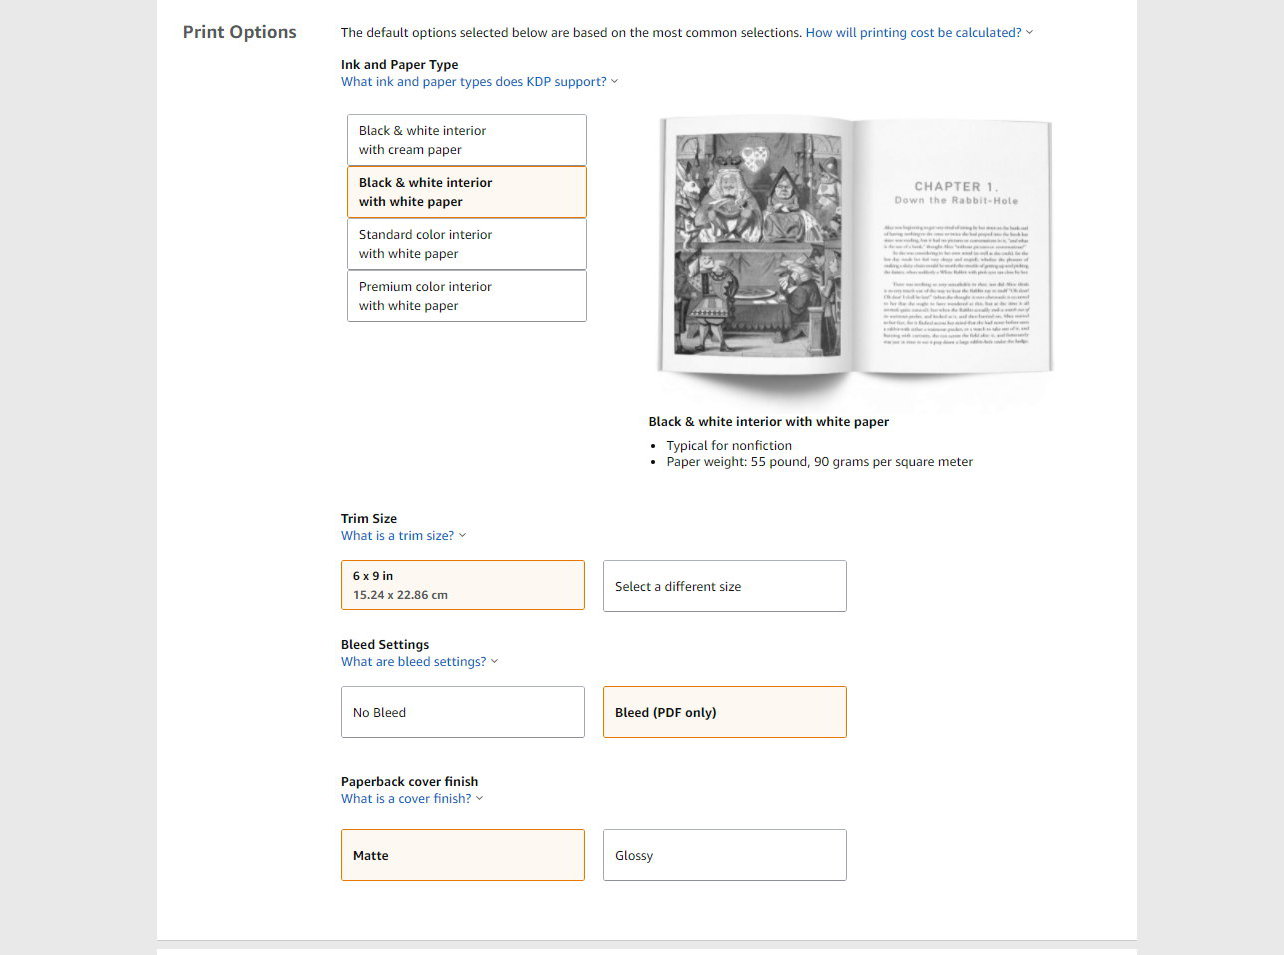
A word about ‘bleed’: if your book interior has content that goes right across from left to right with no margins or gaps, you need to select the bleed option. More about bleed and margins later, but this notebook will have lined pages, and the lines will be all the way to each side, so I’ll select ‘bleed’.
Also, ensure that the black and white paper option is selected as selecting a colour option for your book will bump up the price considerably!
Choose whether you want a ‘Matte’ or ‘Glossy’ finish for your cover. It doesn’t really matter, but I tend to choose ‘Matte’ for my paperbacks and ‘Glossy’ for my hardbacks. It’s entirely your choice which option you want.
Now upload your manuscript (interior) and your cover:
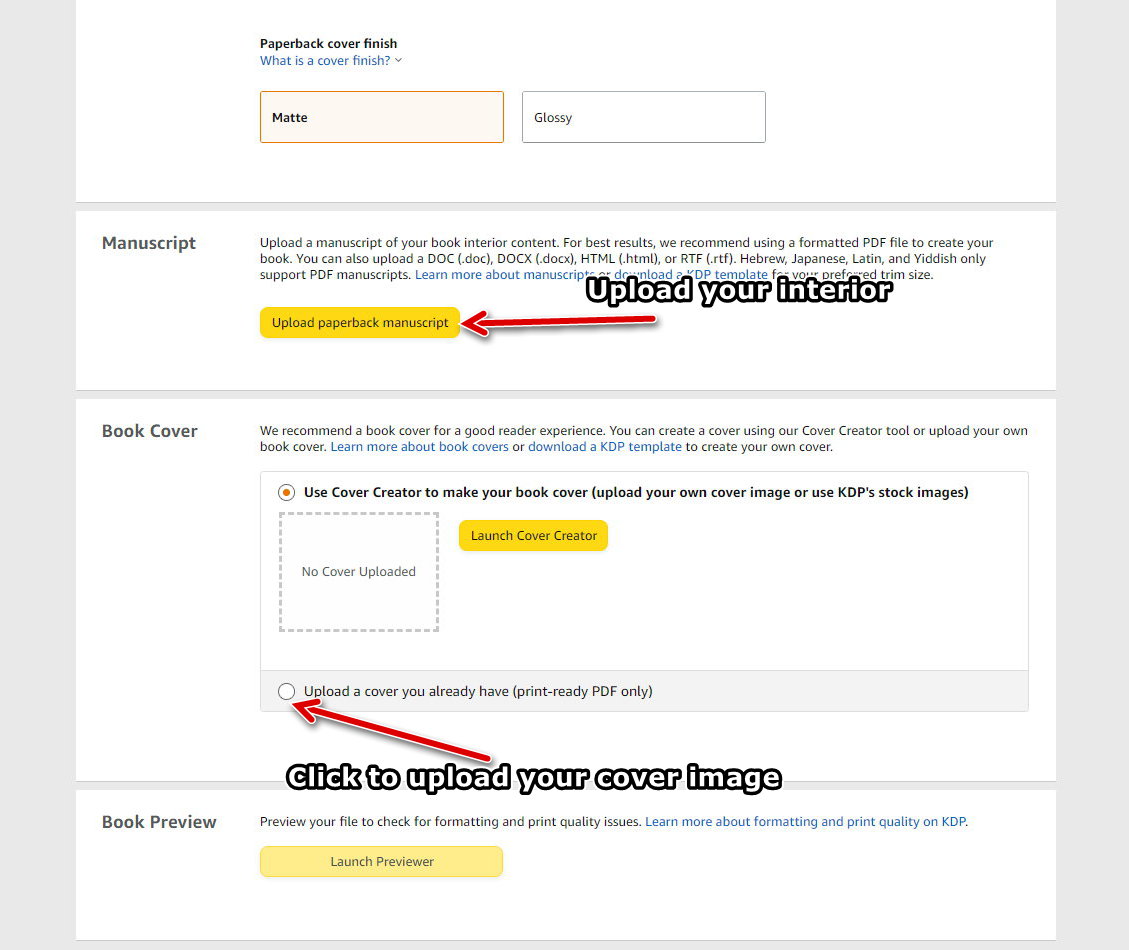
You leave the barcode option unticked. Now you have to preview your book before you can go any further:
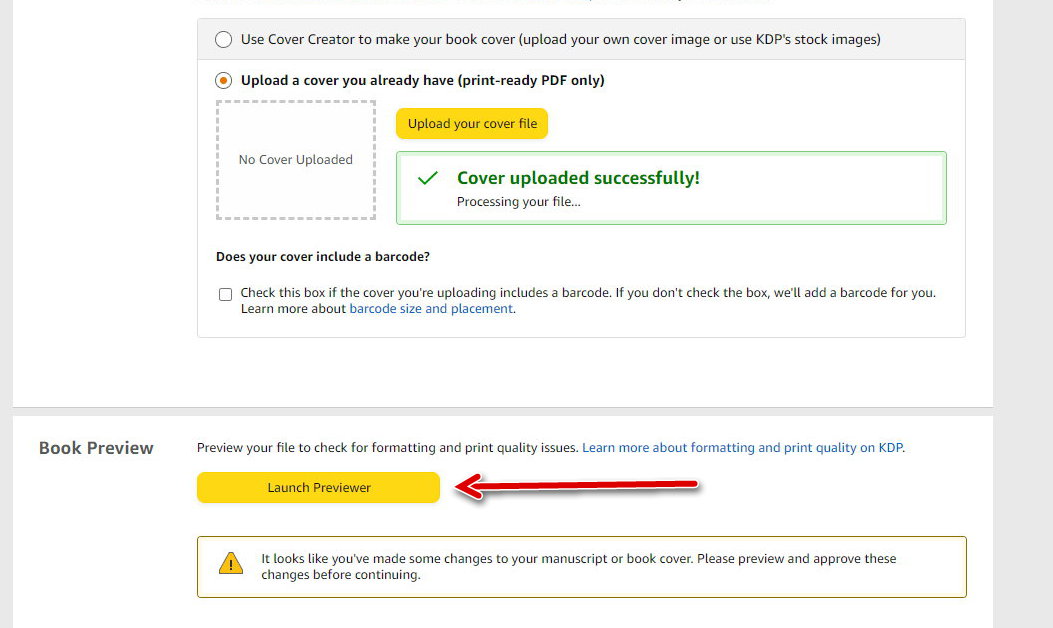
This can be a tedious process that can take anything from a few seconds to literally half an hour! I’ve watched entire episodes of TV shows while waiting for the preview to render!
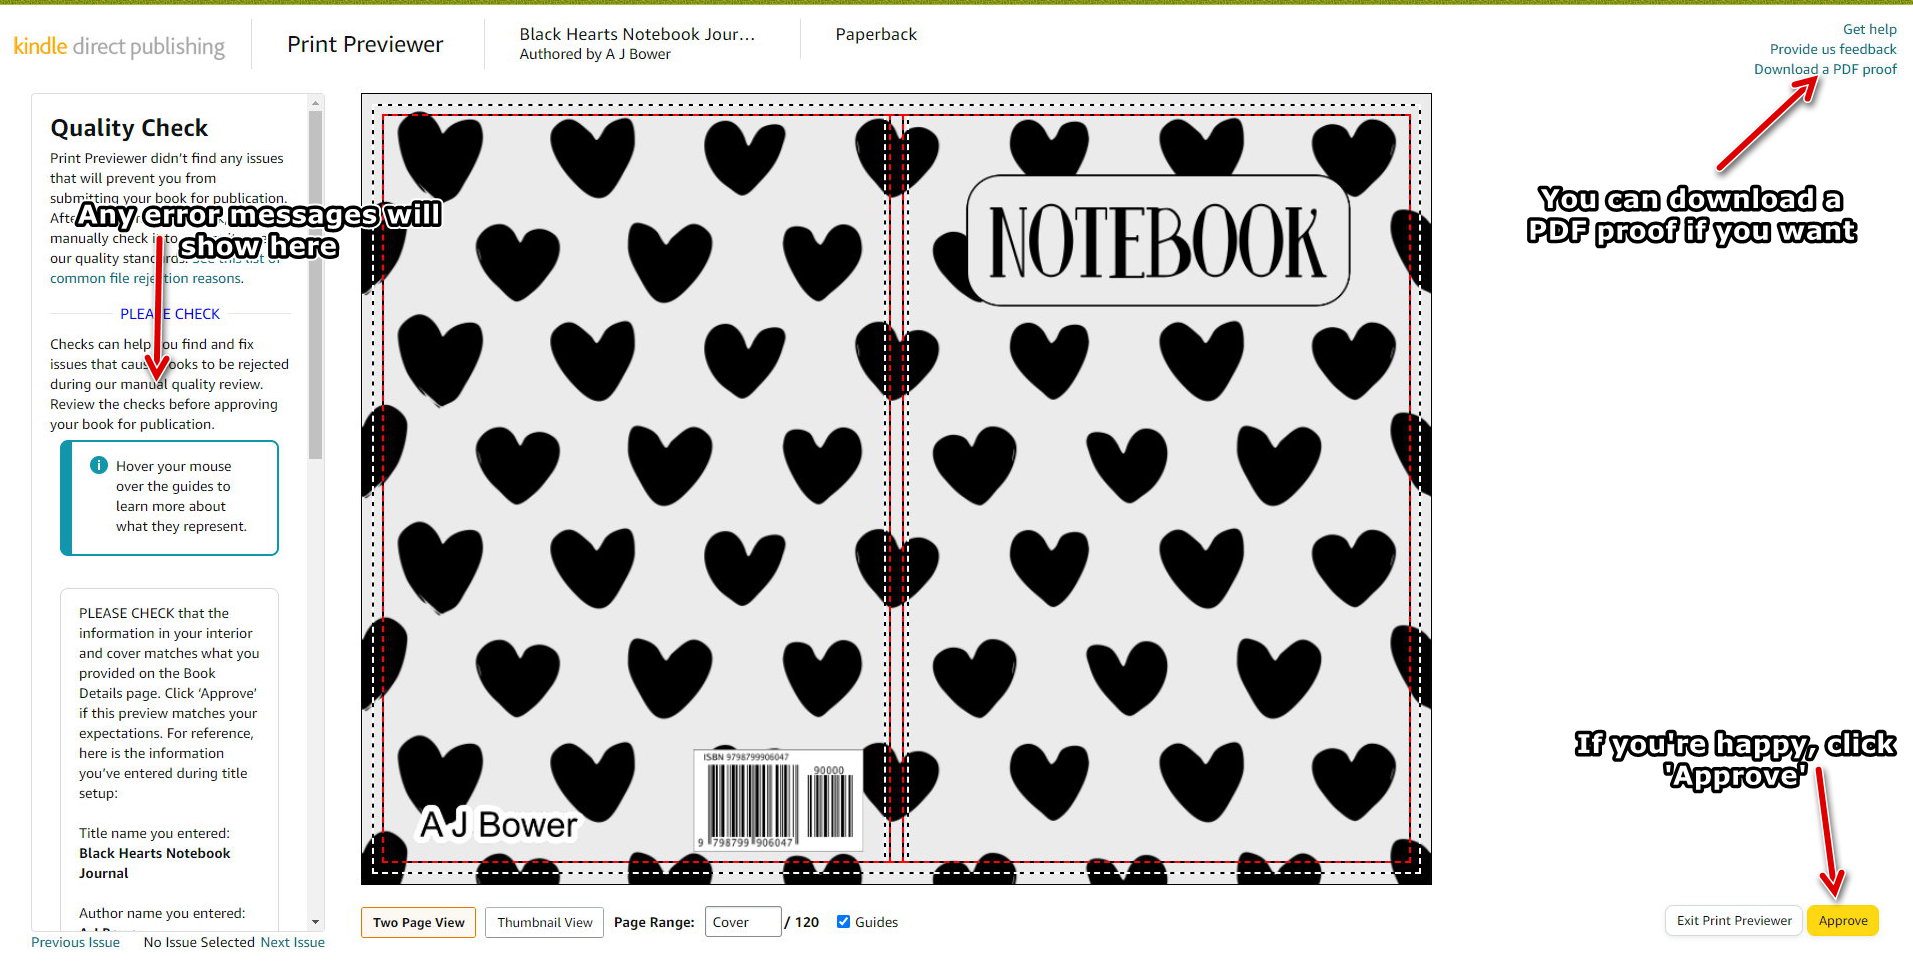
Once you have approved the upload, you will be presented with a summary of printing costs. Save and continue:

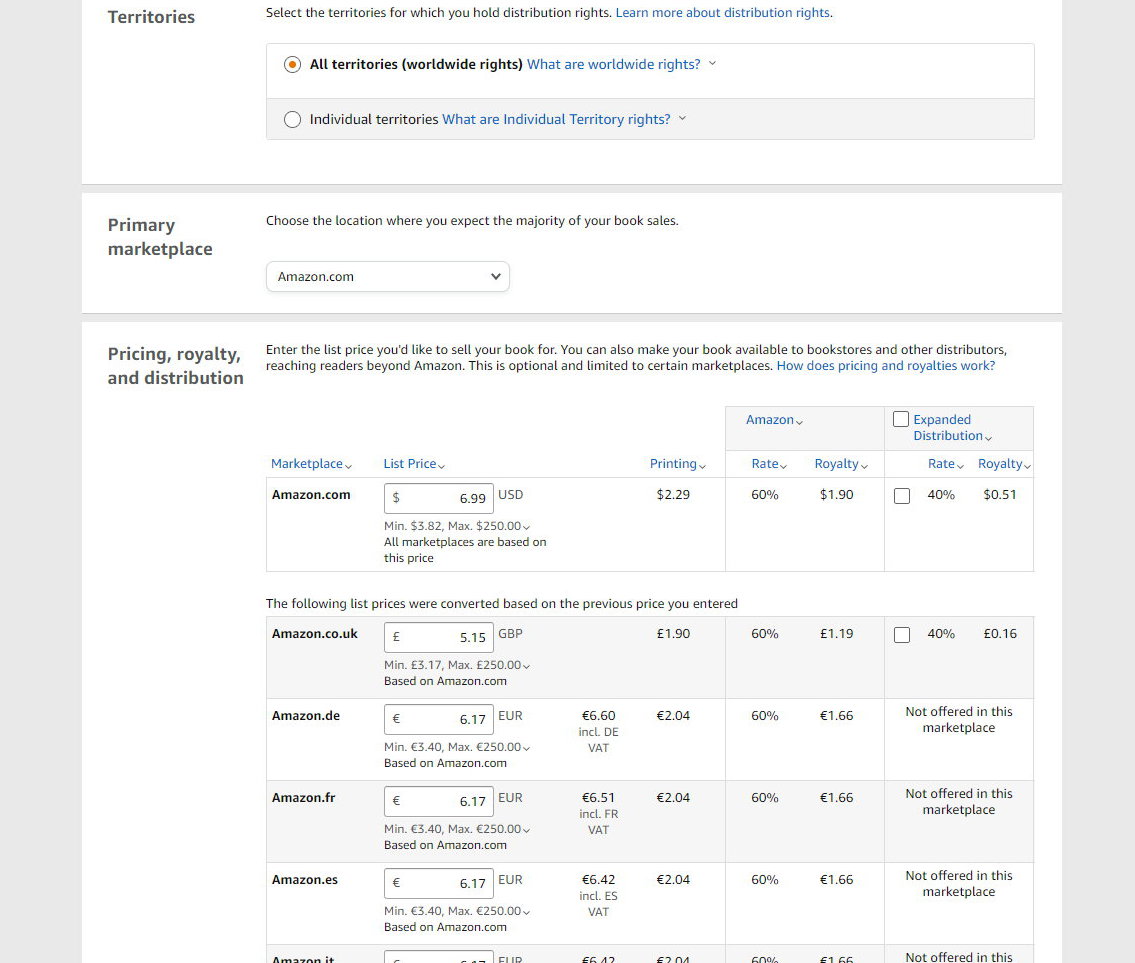
I select all territories and the US market, as the majority of sales will come from America. I set the price at $6.99, which means I will earn a royalty of $1.90 on each book sold. They may not sound like much, but if you make hundreds of sales a day, that will add up! We will go into potential profits later.
If you want to go back and edit your book, do so now before you publish. Once you publish your book, a lot of it will become uneditable. You won’t be able to edit the title, subtitle, paper type etc. But you will still be able to edit your description and keywords. If you make a big mistake, you will need to unpublish the book and start again. You can’t delete published books, you can only unpublish them.
Once you have published your book, it will need to be approved by Amazon. It can take anything from a few hours to a few days, but once it’s approved, you have your first listing!
I hope this was easy to follow. It just goes through the basics of uploading your books, getting it noticed is a different story altogether!