You will need Affinity Designer for this tutorial.
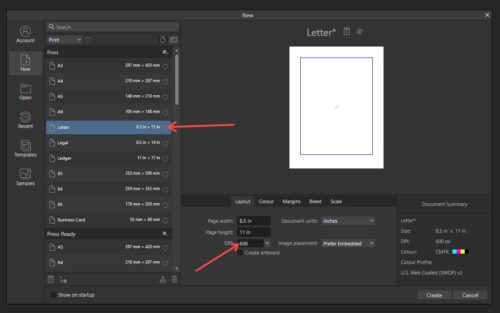
This is actually my favourite way of outlining my stickers. It’s simple and you can outline multiple images at once. I either create lots of images in Procreate, or download them from Creative Fabrica (affiliate link) and other similar sites and then create a new A4/Letter-sized sticker sheet in Designer by clicking ‘File/New’ from the top menu. You will need at least 300dpi for an image that will print nicely:
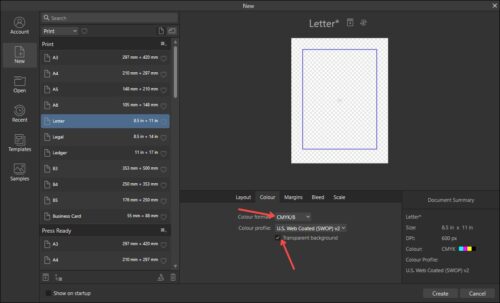
In the next tab, make sure you select CMYK if you will be printing the stickers, and I usually select a transparent background, then add a coloured layer so I can see what I’m doing, then I can just delete or hide the layer if I don’t want a background:
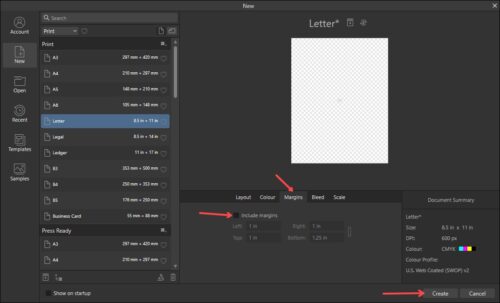
In the ‘Margins’ tab, untick ‘Include margins’ and then click ‘Create’:
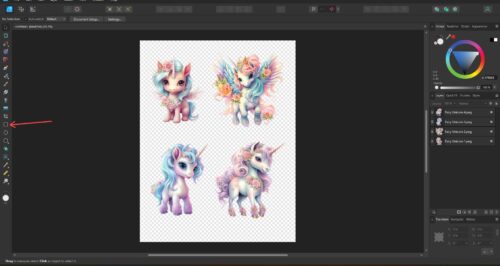
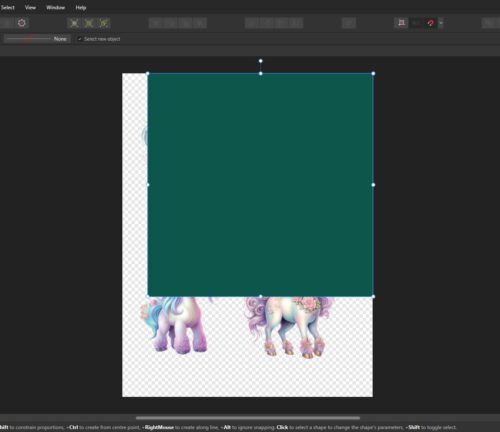
Add your images with enough space between them to add an outline. I usually add a background layer at this point so I can see the image borders clearly. I do this by selecting the square tool and dragging it to fill the canvas:
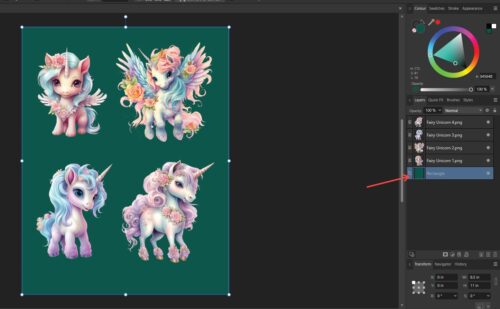
When the canvas is completely covered, I then drag the background layer to the bottom so the images show through:
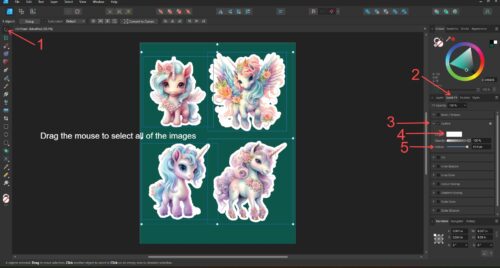
That’s actually the hardest part over with! All you need to do now is select all of the images and add a white outline:
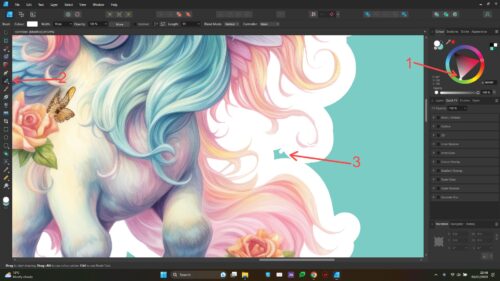
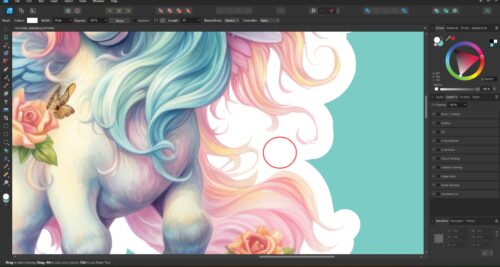
If you look closely, you may see some parts that are not quite coloured in. You can simply select the vector brush with a white colour and fill in the gaps:
After that, you can either keep the background layer, change it’s colour or delete/hide it, depending on what you want to do next with your stickers. 🙂

